Using the GSiteCrawler FTP-client to upload Google Sitemap files
This article will show how you can set up the FTP functionality in the SOFTplus GSiteCrawler. Using the built-in FTP-client can save you time and trouble by automatically uploading your new Google Sitemap files each time you update your site.
Note: To make use of the FTP upload functionality you must of course have an FTP-Account with your provider, for your website :-) . Also, make sure any firewall (software or hardware) will allow you to access an external site via FTP (or at least disable it for the tests to let you concentrate on setting it up correctly first).
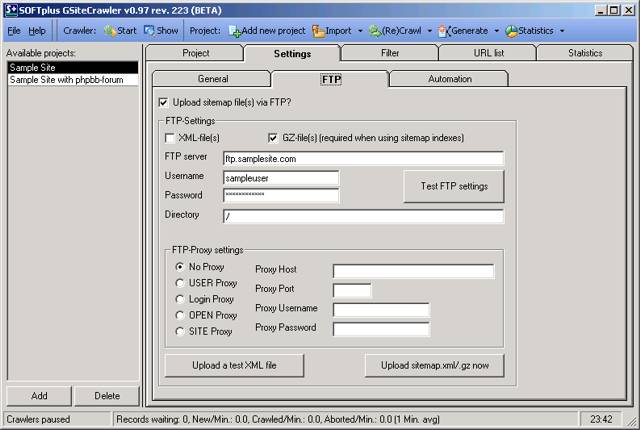
When in the GSiteCrawler, first choose your project, then go into the tab "Settings" and choose "FTP". You should see something like this (though not filled out):

Let's go through the settings. On top, make sure you activate the FTP access by selecting "Upload sitemap file(s) via FTP". This will also activate the rest of the window.
General FTP-Settings

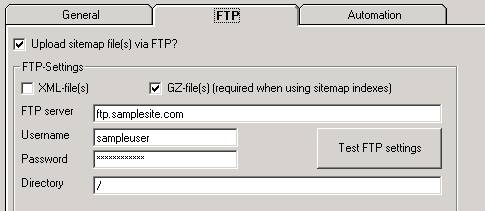
This is where you enter:
- the name of your server (without ftp://, eg "ftp.myserver.com" ,
- your given user name
- and password (the password is hidden).
Additionally, you specify your home-directory for that site. Some servers use "/" for the main directory of your website, if you have several websites available for that FTP-user, you might need to change accordingly (eg. "/www.bigsite.com/" or "/httpdocs/" for older Plesk-setups). You can also specify "." (just a DOT) if you want to stay in the directory that it defaults to - some servers set your directory to the correct one when you log in, in that case you don't need to change it. Afterwards, you can specify if you want to use a active or passive FTP transfer type for the file transfers. If you're uncertain about that, just try it out -- if it doesn't work, try the other type :-).
Specifying FTP Proxy servers

Below the general FTP settings you can find the settings for possible FTP proxy-servers. Unless you know that you need that, you can usually safely ignore these settings.
Test your FTP settings
You can now check your general FTP settings by clicking on "Test FTP settings".

With this test, it will only try to connect to your server, to see if it can be found and to check that the user / password is correct. If your server-settings are correct, and if your firewall / internet-settings allow the program to access the server, it will respond with "OK". If not, you need to check and fix any of these problems before continuing.
Test by uploading a test-file

If the connection test was passed, you can try to upload a generic file to your server. By using "Upload a test XML file" the GSiteCrawler will generate a test-XML-file which will be uploaded to the server. The file is called "$test.xml" and "$test.xml.gz". With this test, it will also check your chosen transfer type (active or passive). You can safely delete that file from your server once the test has been passed.
How to upload your Google Sitemap XML-files
Using the proper FTP settings the program will now ask you if you wish to upload any Sitemap-File you generate. If you have already generated a sitemap file, you can just upload that one with "Upload sitemap.xml/gz now". If you're using automation, the sitemap file will now also be sent via FTP to your server.
If you have more than one sitemap file for your server (eg a large site where a sitemap index is needed), you must upload the .GZ versions of your sitemap files. In this case it will automatically upload all the needed Sitemap.xml.gz files and the matching sitemap-index.xml.gz file. You only need to submit the URL of the sitemap-index file to Google; using the index file it will be able to find your sitemap files. The GSiteCrawler will handle the uploading for you!