A quick tour of the GSiteCrawler
In this tour you're going to generate a Google Sitemap file for your website. We will start by adding a new project, adjusting the settings, crawling your website, generating and uploading the sitemap file and finish by adding the sitemap file to your Google Sitemaps account.
To get to know the program it makes sense to generate the sitemap file for a smaller website (with less than 500 or so pages). Larger wegsites will take longer to crawl - and for a first view it is often easier to play with something smaller, even if it isn't your own website.
Adding a new website / project to the GSiteCrawler
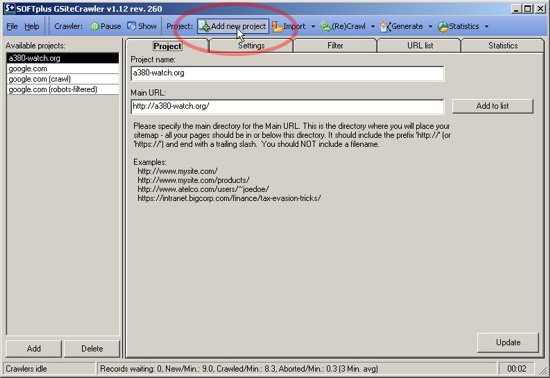
In order to create a sitemap file, you will need to add your website as a new project. The easiest way is to use the wizard by choosing 'Add new project' in the top toolbar.
The New Site Wizard
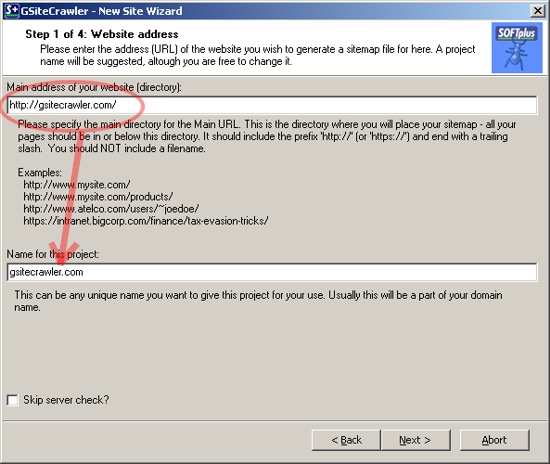
The first step in the wizard is for you to enter your websites address. (If you have the address in the clipboard, it will automatically be filled out.) Enter the address as you would in a browser, remember to include the "http://" in front (or "https://"). You will need to add a trailing slash ("/") so that the name of the folder is identifyable (no filesnames).
The program automatically creates a name for the project (below) based on your address - you can of course change this as you desire.
Before the next step the programm will do a quick test of your website, to make sure it is reachable and to check what kind of server you are using. This might take a short while. (You can skip this step if you desire, just check the box below the project name.)
General Site options in the Wizard

Here we can now adjust most of the main settings for your website. Based on the server check, it will automatically suggest either case-sensitive or non-case-sensitive URLs. By default it will add a filter to remove any session-ID parameters it recognizes, it will add the known HTML file type extensions and add all other recognizable, indexable files to the sitemap as well (images, videos, office-files and other files). Feel free to play with these settings or just leave them in their default settings to start with.
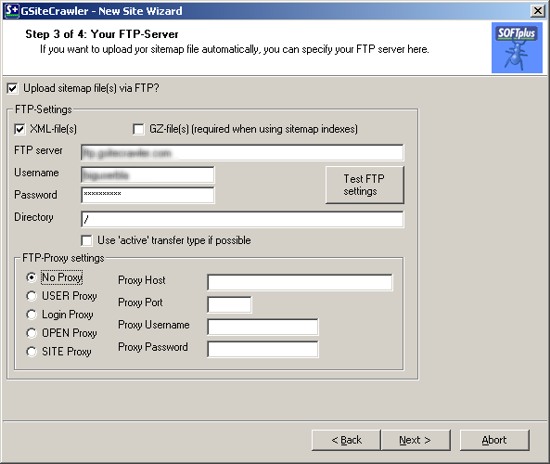
Specifying FTP settings for an automatic upload
If you want the GSiteCrawler to automatically upload your sitemap file, you can specify your servers FTP information. It needs the usual settings, server name, user name, password, folder name, etc. You can test the connection to see if it can connect to the server.
You can choose between the standard XML file or the XML.GZ file to be uploaded. The XML.GZ file is just a compressed version of your XML file, so you might save some time by just uploading that. Google will take either one. If you have a larger site with more than 40'000 URLs you should use the .XML.GZ version (it is required for "Sitemap-Index" files).
Note: You can always upload the sitemap file manually or add it to your web-publisher program for a later upload.
Finishing up - starting the crawlers
The next step sets the rest of the GSiteCrawler up. You will generally want to import your robots.txt file (to make sure the crawler doesn't go where it shouldn't), check for a custom 'file-not-found' page (that doesn't return error code 404) and import a list of URLs already indexed with Google for this site (to get the crawler started). With 'Scan your website now' it will start crawling your site as soon as you continue, with 'Wait for scan to complete and upload file' it will automatically upload your sitemap file once it's done (of course this is only possible if you have specified the correct FTP settings).
Crawling, crawling, crawling ...
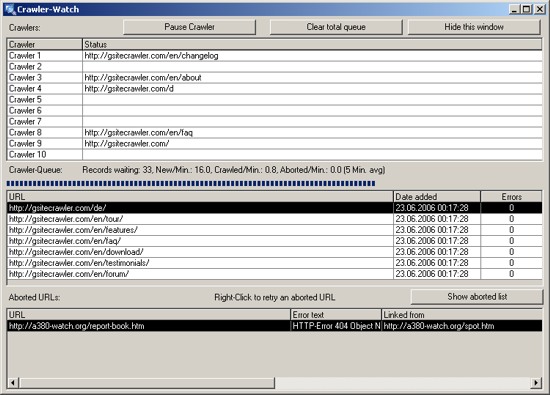
After the last step in the wizard (and if you told it to do so), it will start crawling your website. Depending on the size of your website, this might take some time. The speed it takes is dependant on many factors...
The numbers for the queue are updated regularly to reflect the current known information (of course if a site is only half-crawled, the program will only know about half of the URLs, so it can't judge how much is still unknown). Aborted URLs are shown in the bottom table - these can be URLs that are either broken links or that were mistakenly interpreted as links.
You can pause the crawler at any time, close the program and restart later. If you want to abort a crawl, you should pause the crawlers, wait until they are empty and then clear the queue (otherwise it will just clear the waiting list but add any URLs found in the running crawlers).
Automatically uploading the sitemap file via FTP

Once the crawlers are done, and if you specified to do so in the settings, the program will automatically generate a Google Sitemap file and upload it to your server.
If you did not specify to do this, you can just click on the 'Generate' button in the top toolbar to generate the Google Sitemap file. You can then upload the sitemap file manually or with a tool of your choice (eg Dreamweaver, Frontpage, etc.).
Checking your Google Sitemap file
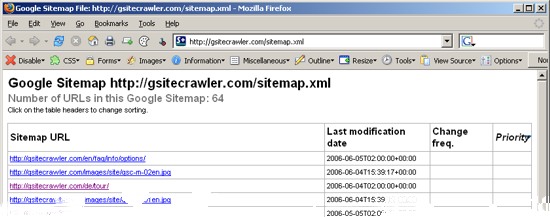
Let's just check the sitemap file before we submit it to Google. To do that, you can just enter the URL to your sitemap file in a browser (this doesn't seem to work with Opera 8, though). It should display similar to the one here. The layout comes from a 'stylesheet' which just makes the XML data look nicer. You can look at the real data beneath by using the browser function 'view source' which will give you something machine-readable like the image below. You should not change anything in the sitemap file itself - at least until you are certain that you know what you are doing :-).
Next step: Submitting your sitemap file to your Google Sitemap account.